Spooky chocolate ghost sandwich cookies with rich cocoa biscuits & hazelnut filling. The perfect cute & easy Halloween treat for parties & trick-or-treat!

Ghost Cookies
It’s finally Halloween season, and I couldn’t be more excited! I love seasonal holidays like Easter, Halloween, and Christmas because they make baking so much more fun and creative. Halloween is the perfect time for spooky-themed bakes, from cute ghost cookies to fun monster cupcakes. I have so many Halloween baking recipes to share with you this year, and I hope you love them as much as I do and feel inspired to bake something spooky this season!
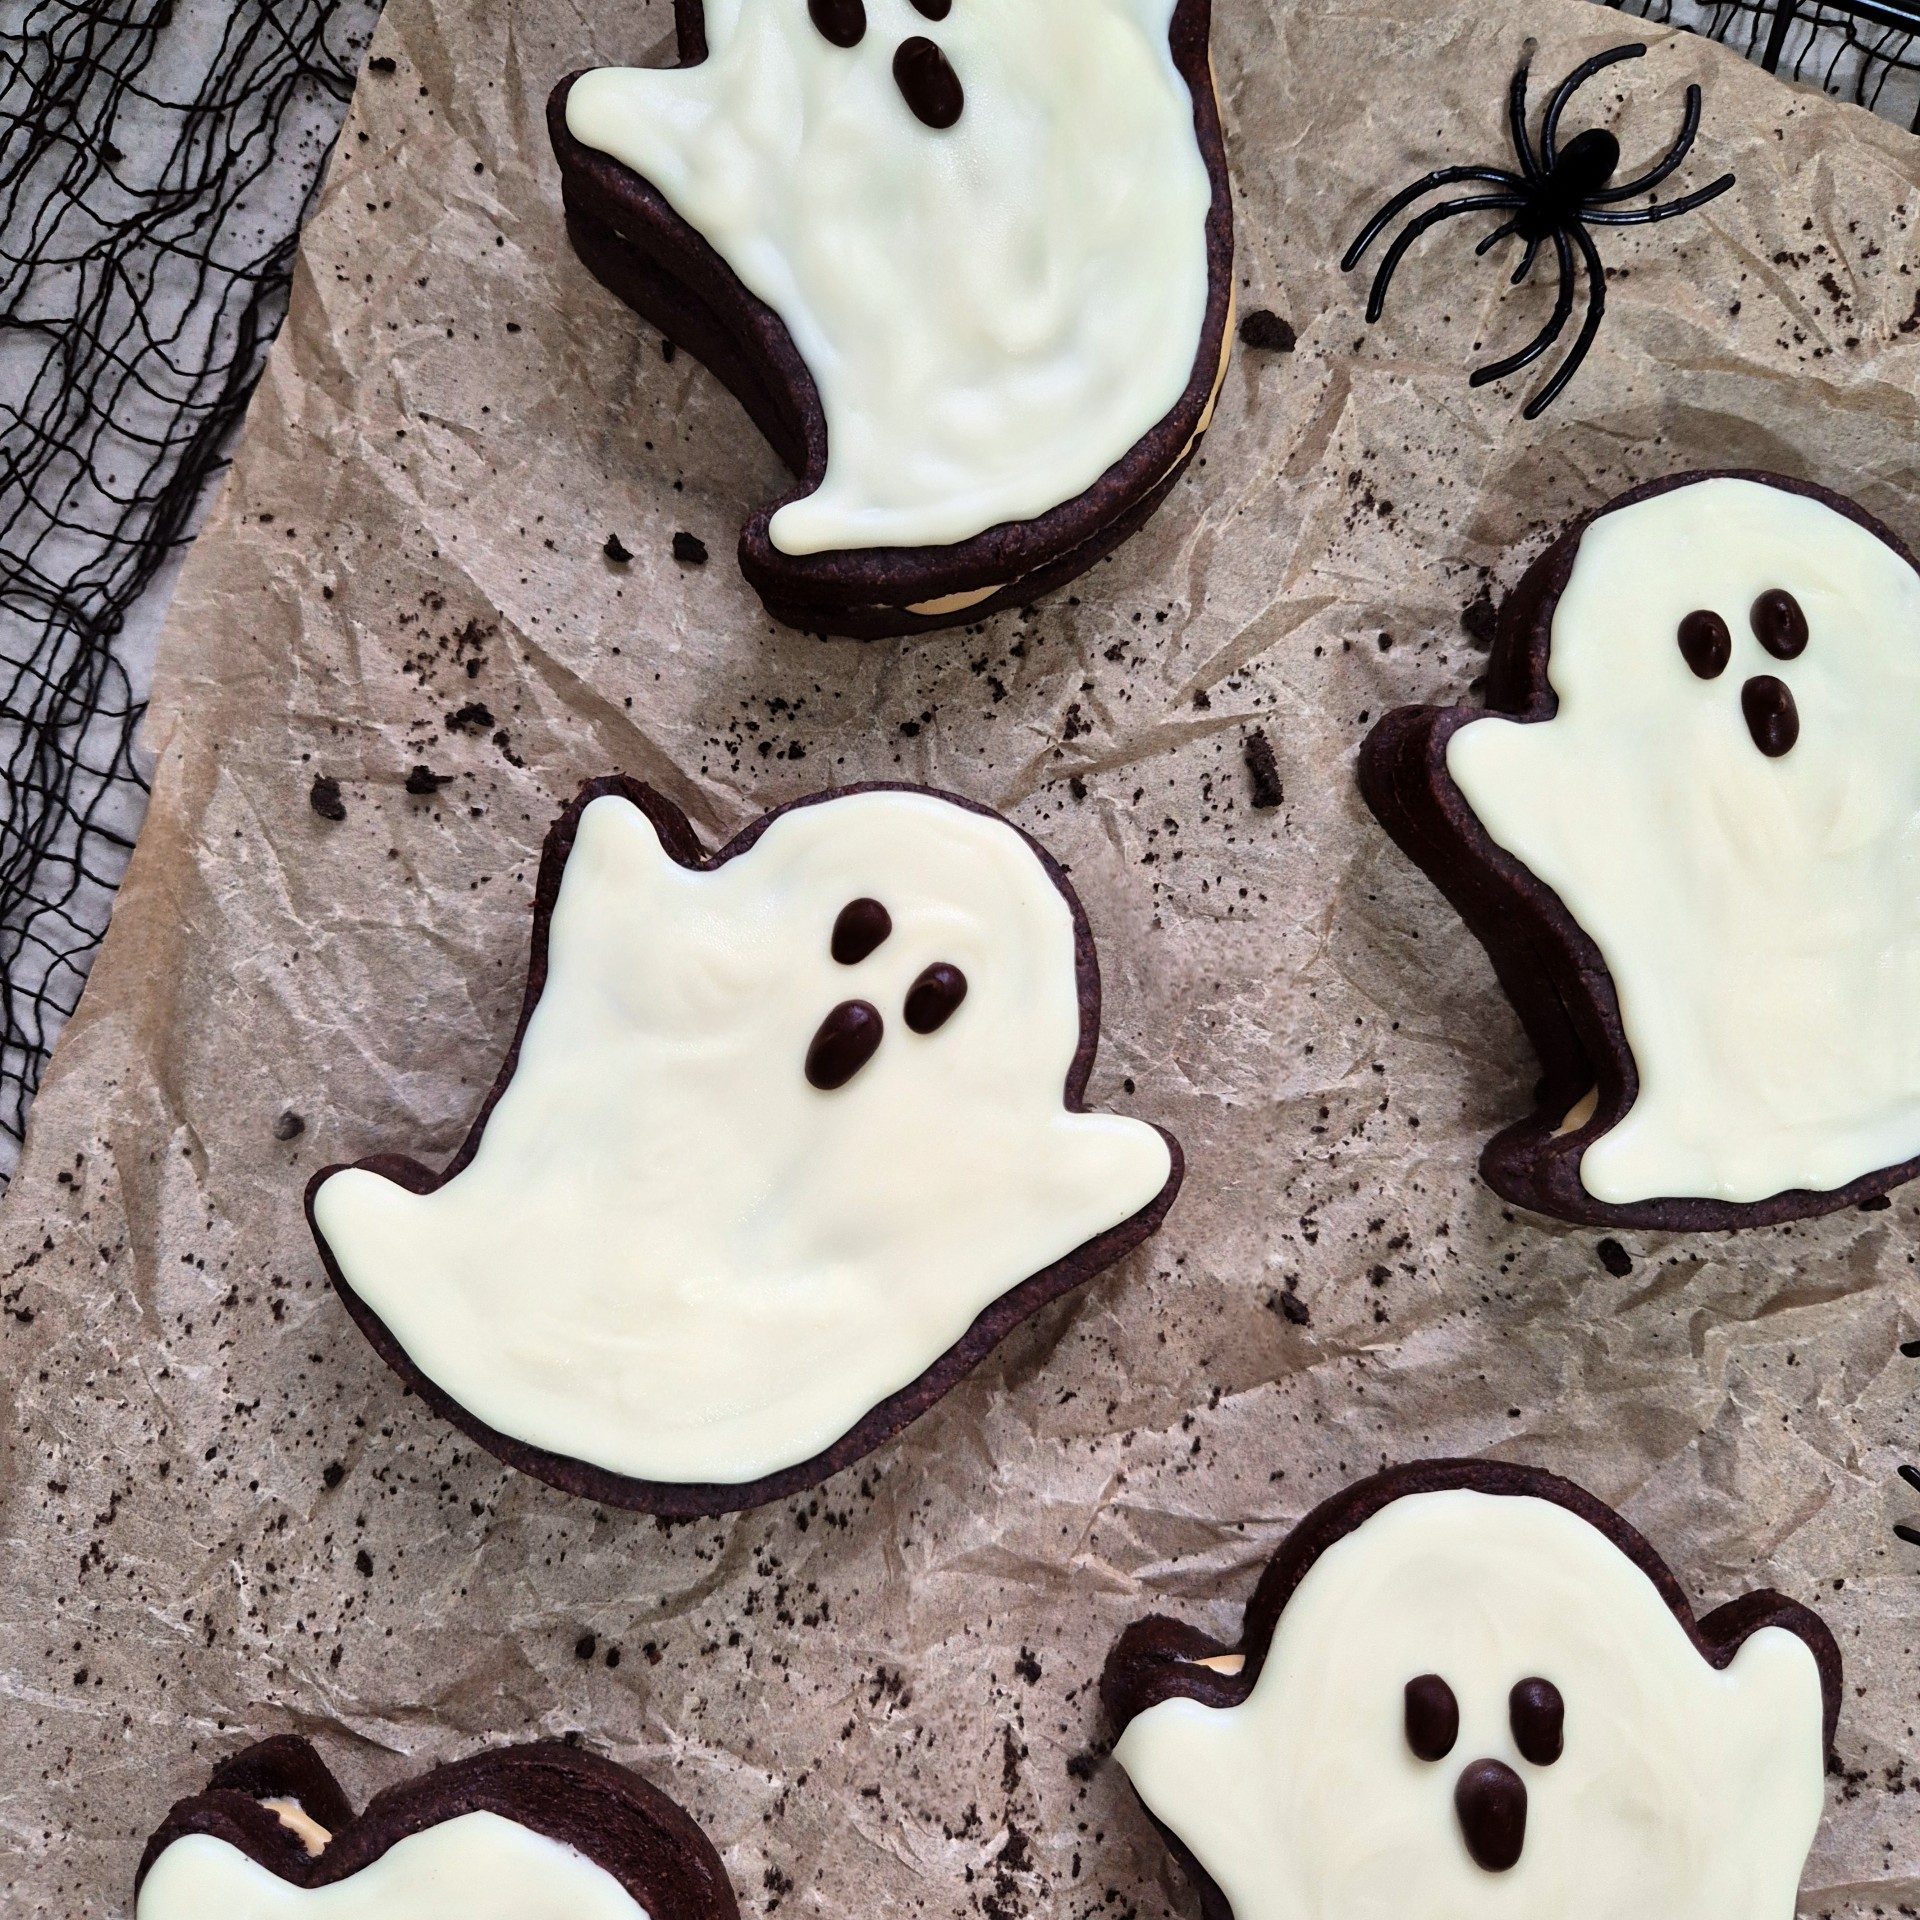
These Ghost Chocolate Sandwich Cookies are the best Halloween baking treat. they’re cute, spooky, and absolutely delicious! Made with rich, buttery chocolate cookies, sandwiched together with a creamy hazelnut filling, and decorated as adorable little ghosts, they’re perfect for Halloween parties, trick-or-treat snacks, school lunchboxes or spooky baking fun with kids.
If you’re looking for easy Halloween cookies that still look impressive, these ghost cookies will be your new go-to recipe.

Why You’ll Love These Ghost Chocolate Sandwich Cookies
- Perfectly Spooky for Halloween– A must-bake treat for Halloween season!
- Rich Chocolate Flavour– Deep cocoa cookies paired with a hazelnut filling.
- Fun & Kid-Friendly– A great baking activity to do with kids during spooky season.
- Perfect Snack for School Lunchboxes– Fun, festive, and just the right size for a sweet treat at school or after-school snacks.
- Make Ahead Friendly– Cookies stay fresh for days and can even be frozen.
- Customisable– Use white chocolate or royal icing to decorate ghosts however you like. You can also use a filling of your choice, I chose to use hazelnut but you could use pistachio, nutella or even jam for these cookies!

Ingredients
- Unsalted Butter– Butter is key for creating that rich, indulgent flavour in your Halloween chocolate cookies. It also gives the dough a tender, melt-in-your-mouth texture. Using unsalted butter allows you to control the salt levels in your bake.
- Brown Sugar– Adds moisture and a subtle caramel-like flavour, keeping your cookies soft and chewy. perfect for Halloween chocolate sandwich cookies.
- Egg– The egg binds all the ingredients together, giving structure to the cookie dough. It also adds a little richness, helping your cookies hold their shape during baking.
- Plain Flour– The foundation of the dough, plain flour provides structure to the cookies without making them too dense, keeping them soft enough for sandwich cookies.
- Cornflour– A secret weapon for achieving tender, soft cookies. Cornflour reduces the protein content of the dough slightly, which prevents the cookies from becoming tough and helps them stay soft. ideal for sandwich cookies.
- Cocoa Powder– Essential for that rich chocolate flavour and the dark, spooky colour that makes these cookies perfect for Halloween ghost-themed treats. It also balances the sweetness of the filling.
- Salt– A pinch of salt enhances the chocolate flavour and balances the sweetness of the cookies and filling, making each bite taste richer.

Tips & Tricks for Perfect Ghost Cookies
- Get creative– Use edible glitter, sprinkles, or coloured icing to give your ghosts personality.
- Chill the dough– This helps the cookies keep their ghost shape while baking.
- Cornflour- Adding a little cornflour (cornstarch) to your dough gives the cookies a softer, melt-in-your-mouth texture. If you don’t have cornflour, you can just use plain flour instead!
- Use a good cookie cutter– A clean-cut shape makes decorating much easier. Dust your cutter in icing sugar too, this will help the cookies release from the cutter easily.
- Roll the dough evenly– For even baking and consistent cookie sizes, roll out the dough to the same thickness.
- Don’t overbake– Remove cookies while they’re just set to keep them soft for sandwiching.
- Don’t Over Work the dough– Try not to over mix the dough as it can lead to tougher cookies.
- Decorating– For precise ghost shapes and drizzle, use a piping bag (or a sandwich bag with the tip snipped off) to control the flow of the melted chocolate or icing.
- Make ahead– The cookies can be made ahead, you can also freeze the dough and bake when you need them.
- These ghost cookies are not just party-perfect but also make great Halloween lunchbox snacks or festive trick-or-treat bag treats.

Frequently Asked Questions
Can I make these cookies dairy-free?
Yes! Use dairy-free butter and oat milk, and check your chocolate or icing is dairy-free.
How long do these cookies last?
Store in an airtight container at room temperature for up to 4 days or in the fridge for up to a week.
How do I stop my cookies from spreading?
Chill the cookie dough for at least 1 hour before baking. Cold dough spreads less, keeping the ghost shapes neat and perfect for decorating.
Can I freeze the cookies?
Absolutely! Freeze un-decorated cookies in a sealed container for up to 2 months. Thaw and decorate when ready to serve.
Can I use store-bought cookie dough?
Yes, but homemade dough gives you that rich chocolatey flavour and softer texture.
Can I use a different filling?
Of course! You can use nutella, pistachio spread, biscoff spread or even jam!
Are these cookies good for Halloween parties or lunchboxes?
Absolutely! They’re perfect as a fun Halloween party dessert, for trick-or-treat bags, or as a cute seasonal snack in lunchboxes.
Storage & Make-Ahead
- Store the assembled cookies in an airtight container for 3–4 days.
- Freeze the baked cookies (undecorated) for up to 2 months.
- Decorate after thawing to keep them looking fresh and neat.

Recommended Equipment
- electric hand whisk
- stand mixer (Use code BITEOFBAKES for 20% off!).
- Edible Eyes
- Ghost Cutter
- Cocoa Powder
I earn a small amount of money if you buy the products after clicking on the links. You will not be charged anything extra for this! Thank you for supporting biteofthebakes!

Pin It
These Ghost Chocolate Sandwich Cookies are the perfect combination of spooky fun and delicious flavour for Halloween. With their rich chocolate cookies, creamy filling, and cute ghost decoration, they’re not only a treat for parties but also a fun baking activity for kids.
Adding cornflour keeps the cookies soft and tender, while chilling the dough ensures the ghost shapes stay perfect. These cookies are versatile, make-ahead friendly, and even suitable for school lunchboxes or trick-or-treat bags.
grab your cookie cutters, chocolate, and edible eyes, and get ready to bake these fun, spooky, and delicious chocolate ghost cookies this Halloween season!

Loved these Halloween cookies? Don’t forget to leave a comment and star rating below! Share your cookie creations with me on Instagram @biteofthebakes or use the hashtag #biteofthebakes I’d love to see them!
Share your bake with our community over on Facebook!
Don’t want to miss another easy halloween dessert recipe? Subscribe here to get notified when a new recipe comes to the blog!
Recommended


Ghost Chocolate Sandwich Cookies
Ingredients
- 200g Unsalted Butter (Softened).
- 100g Light Brown Sugar
- 250g Plain Flour
- 30g Cornflour
- 80g Cocoa Powder
- 1/2 tsp Salt
- 4 tbsp Milk (I use semi-skimmed milk).
- 200g White Chocolate (Ghost Decoration).
- 50g Milk or Dark Chocolate (Ghost Decoration).
- 100g Hazelnut Filling
Instructions
- Beat the butter and sugar together until light and fluffy. I use a stand mixer but you could use an electric hand whisk.
- Add in the plain flour, cornflour, salt and milk and mix until a dough is formed. You may have to take it out of the mixer and combine it slightly with your hands!
- Refrigerate the dough for 1 hour.
- Roll out the dough to about a 1/2cm in thickness and then cut out your ghost shapes.
- Transfer your ghost biscuits onto a lined baking tray and chill again for 10 minutes. This will help the cookies keep their shape while baking.
- Once the dough has chilled, preheat your oven at 160c/Gas mark 4.
- Bake the biscuits in the oven for 10-12 minutes.
- Once baked, allow to chill completely before adding decoration and filling.
- Take half of your biscuits and decorate them as ghosts using white chocolate and milk chocolate. Allow the decoration to set in the fridge.
- Once set, on the undecorated biscuits add 1 tsp of hazelnut filling and add the decorated biscuit on top to create your sandwich cookies!
- Finally Eat!
Notes
- Store the assembled cookies in an airtight container for 3–4 days.
- Freeze the baked cookies (undecorated) for up to 2 months.
One response to “Chocolate Ghost Sandwich Cookies”
[…] treat that’s both yummy and Insta-worthy, these chocolate sandwiches are perfect to nibble during a party. Plus, this desert is versatile, so feel free to switch up the […]